Adding Instance
Install Monitoring Agent to an Instance in StackBill CMP
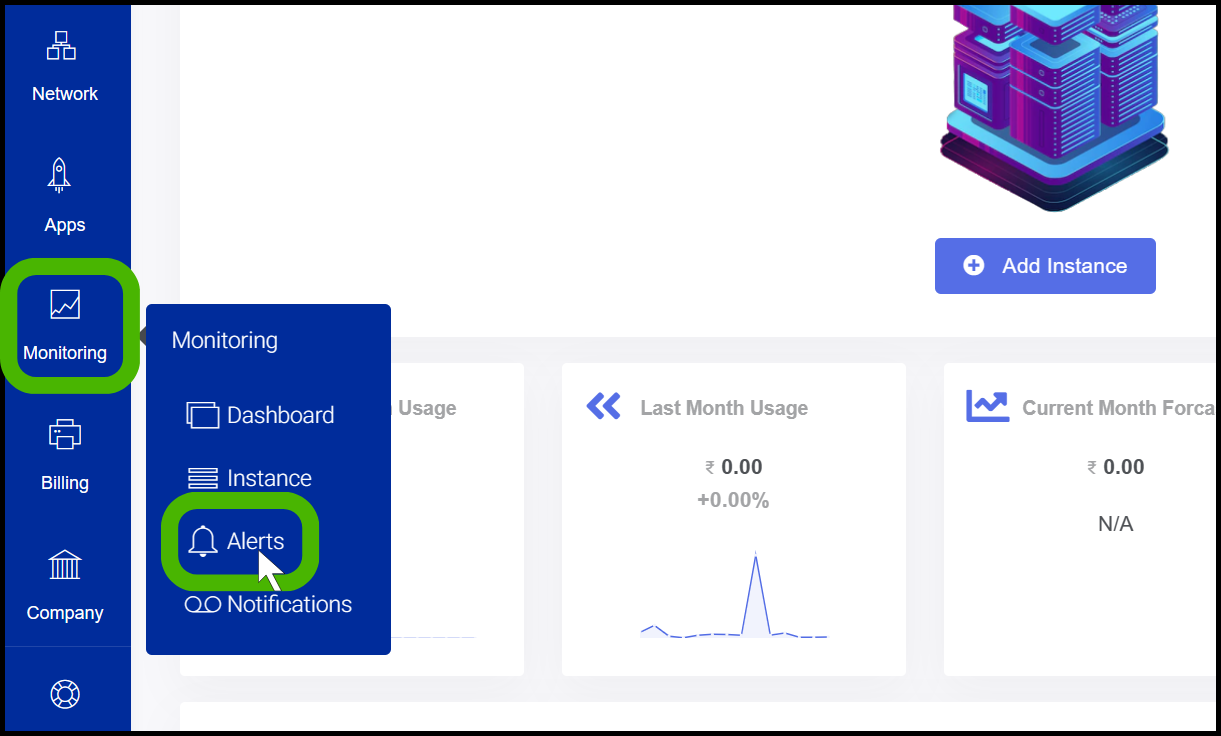
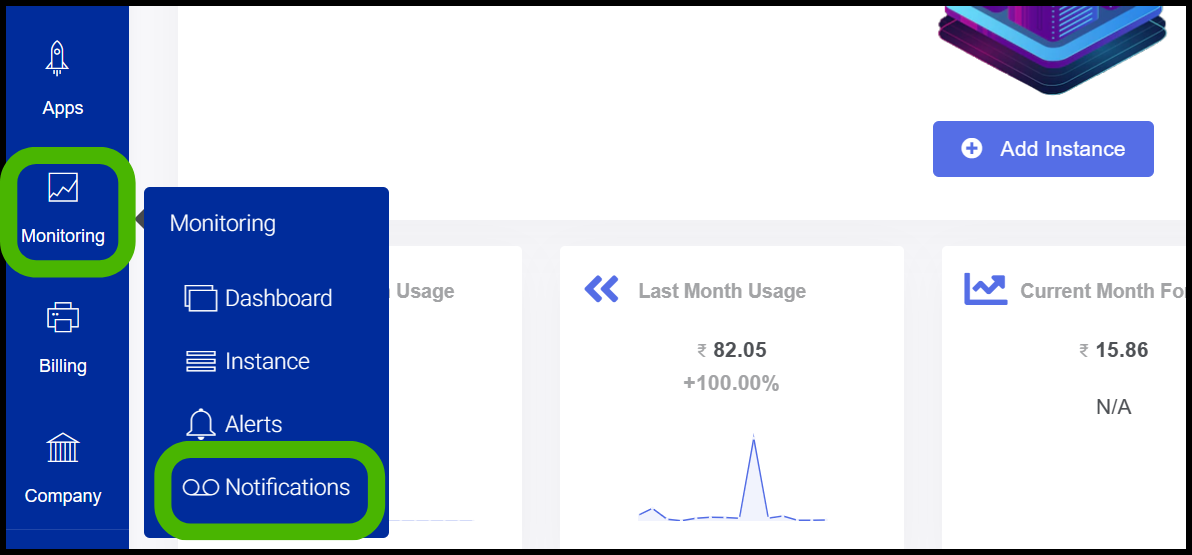
- The Monitoring option can be found on the left side of the portal.
- The screen displays a pop-up menu. To Install Monitoring Agent to an Instance, click on the Instance option from the menu.
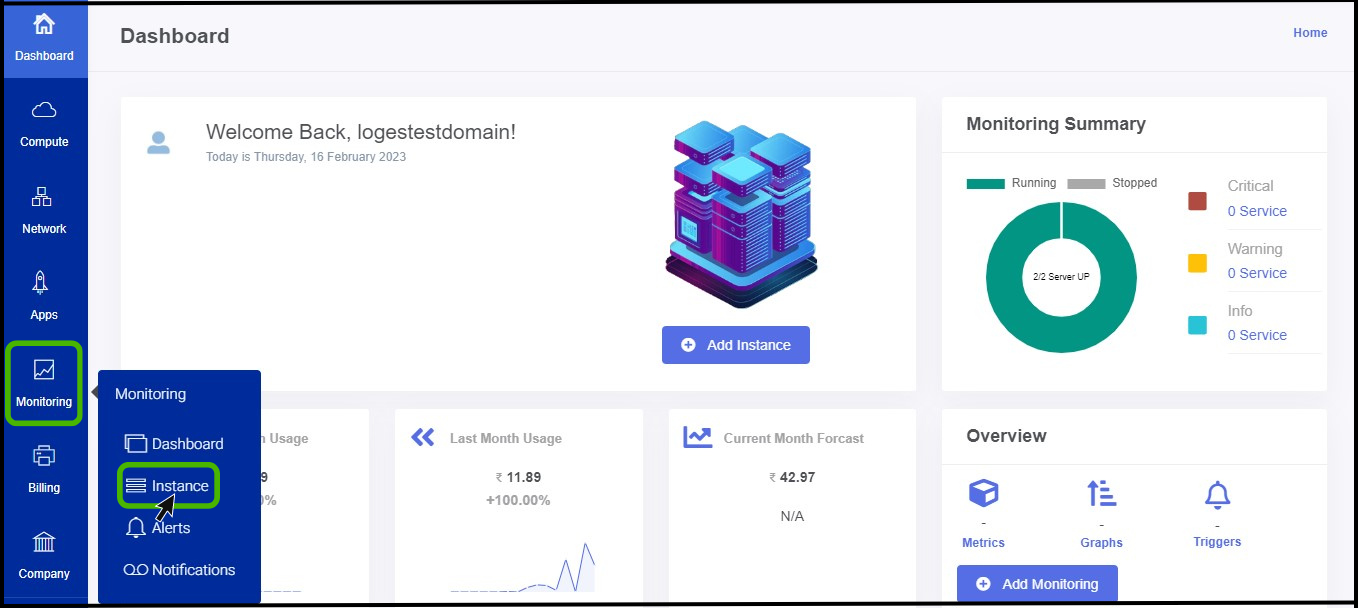
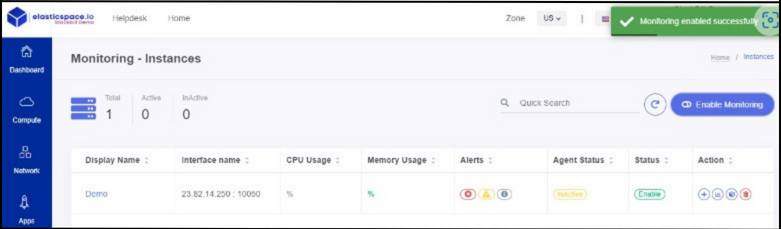
- Monitoring-Instance page appears on the screen.
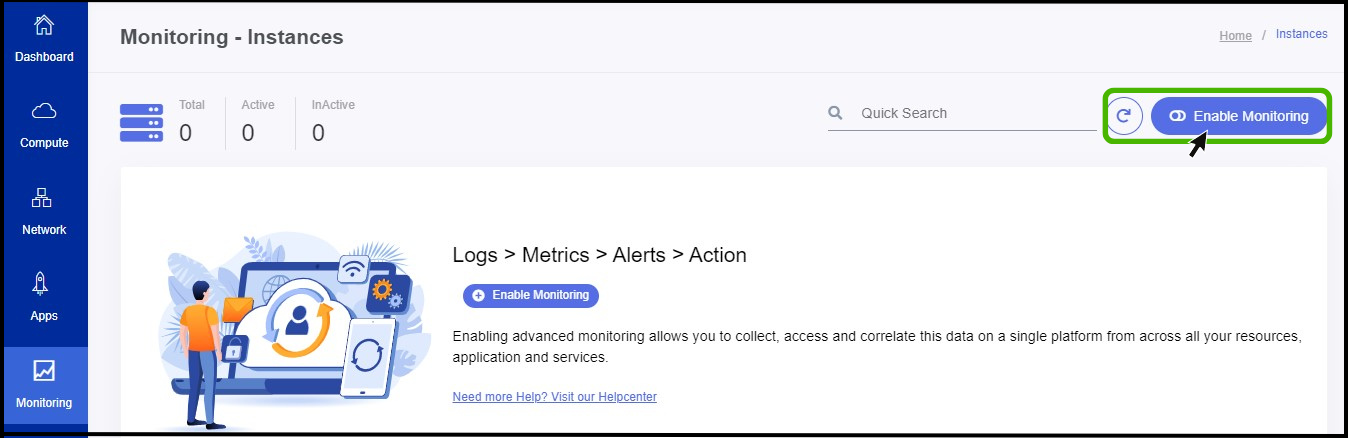
- At right side of the panel user can see a option called Enable Monitoring click on it to Enable the Monitoring to the instance.
- Enable Monitoring screen appears.
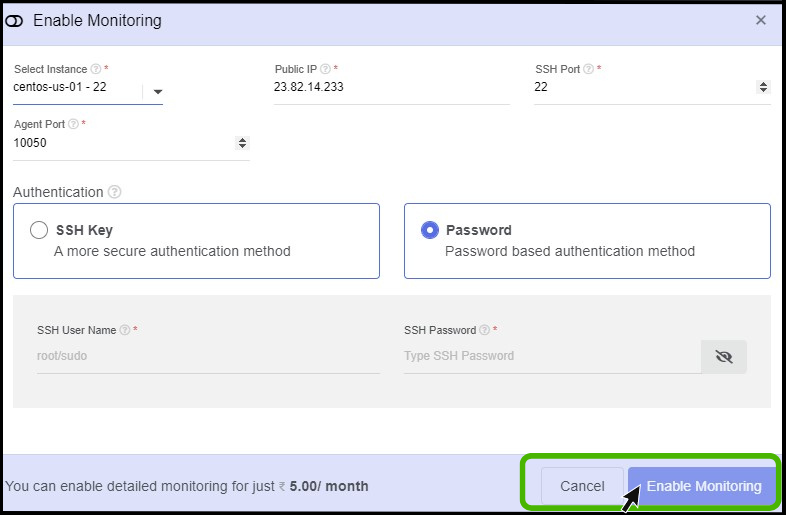
- Select Instance - To enable monitoring, select the instance to which monitoring t be enabled.
- Public IP - Instance IP addresses are automatically filled in after the instance got selected.
- SSH port and Agent Port - SSH port and Agent Port are automatically filled after the instance has been selected.
- You can select the authentication for the instance in which a user can take creditionals from the instance details page.
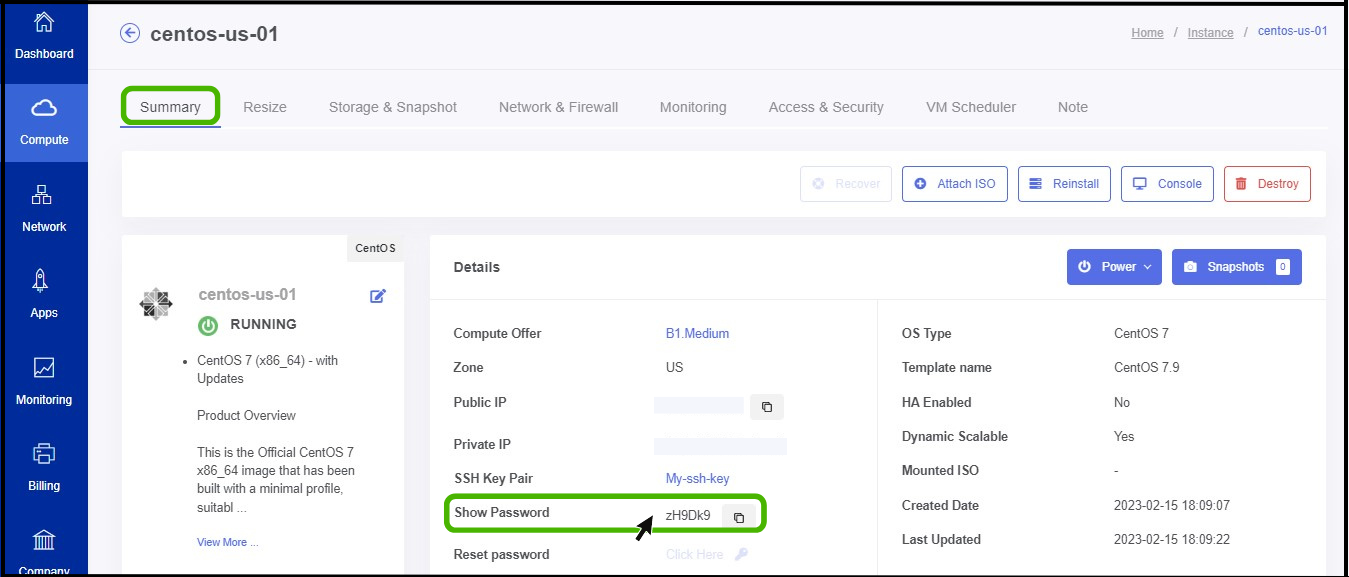
- Its possible to take a Password from Instance details Page.
- Copy the password and paste it on Root Password and Click on Enable Monitoring.
tip
- Monitoring has been Enabled Successfully.
Setting up Monitoring Alerts in StackBill CMP
- The Monitoring option can be found on the left side of the portal.
- The screen displays a pop-up menu. To Setup Monitoring alerts, click on the Manage Notification option from the menu.
- Monitoring Alert option appears on the screen.
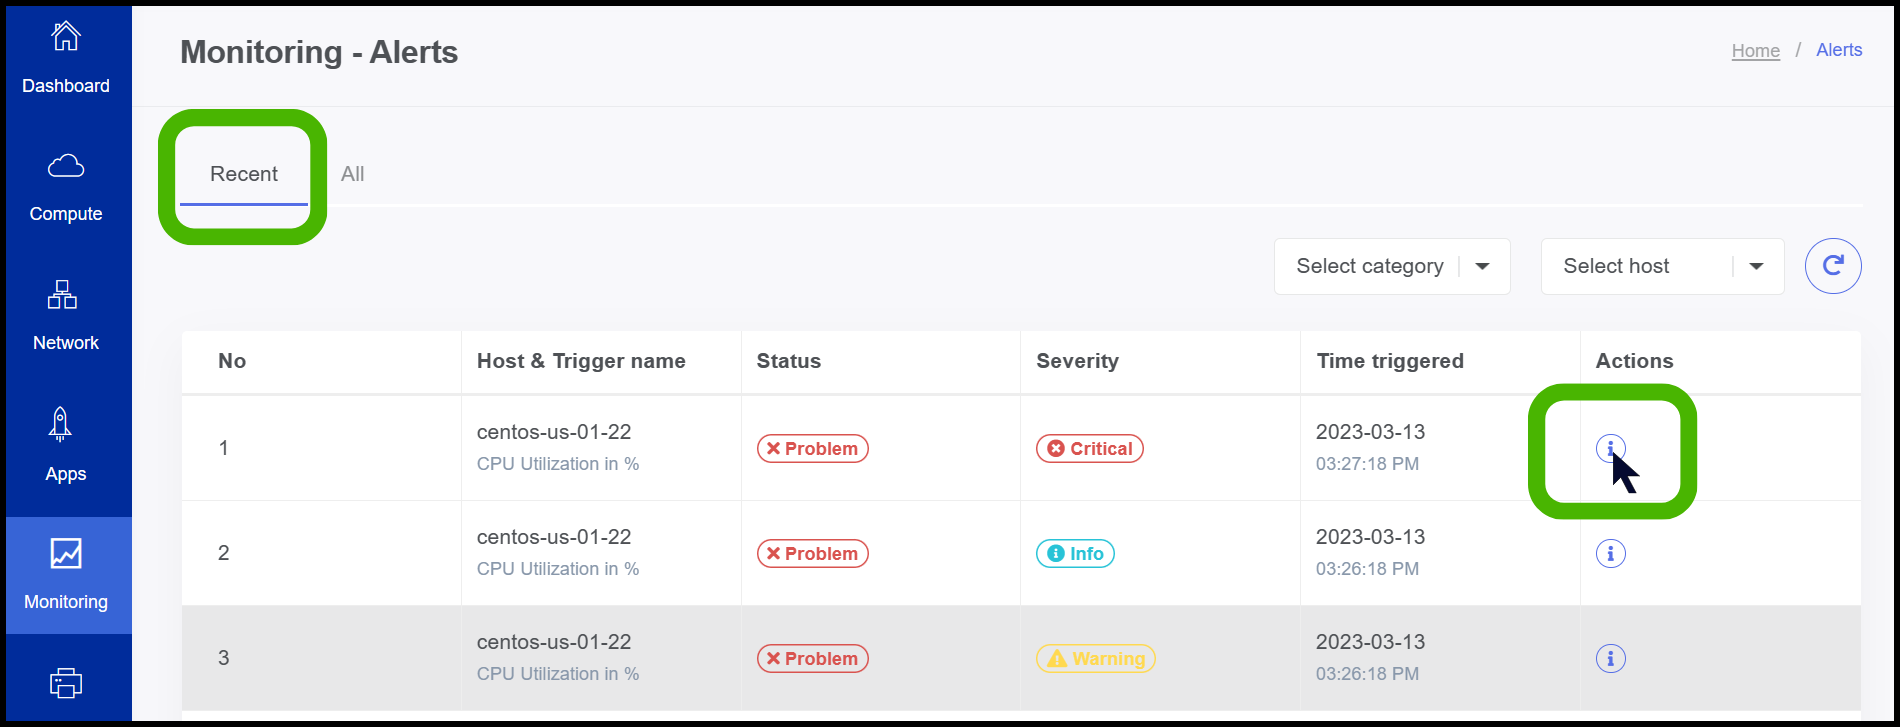
- Here the user can view the current status and severity of the VM.
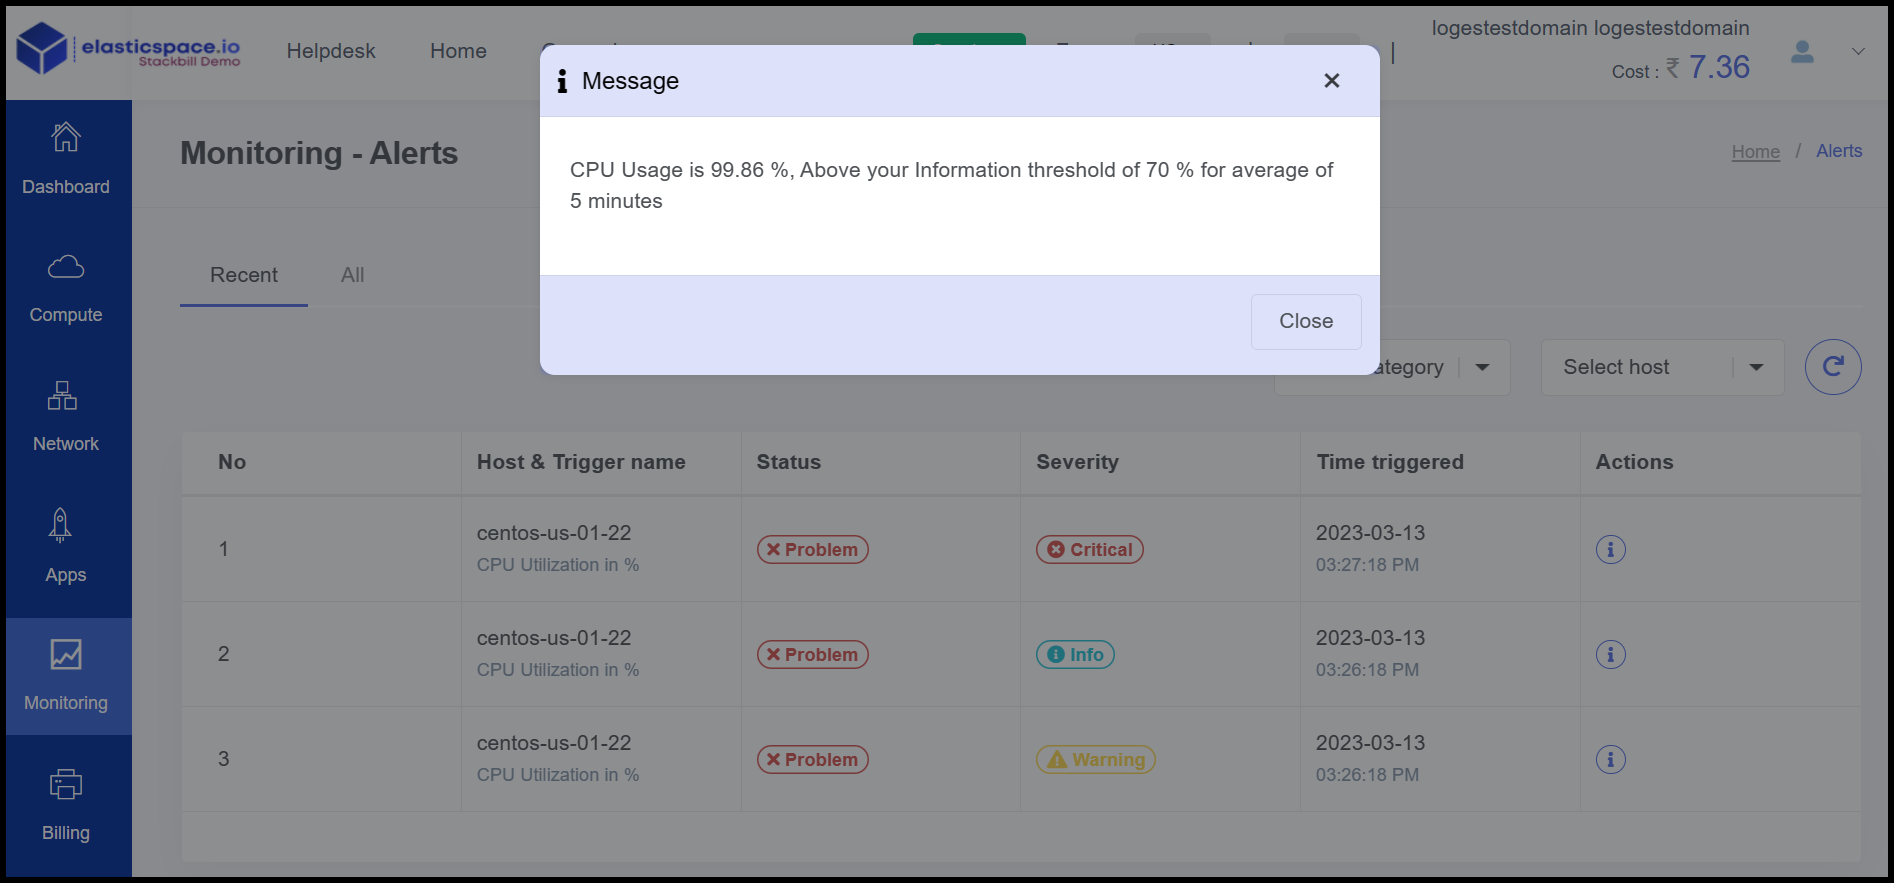
- The reason for Alerts can be found in the Action menu.
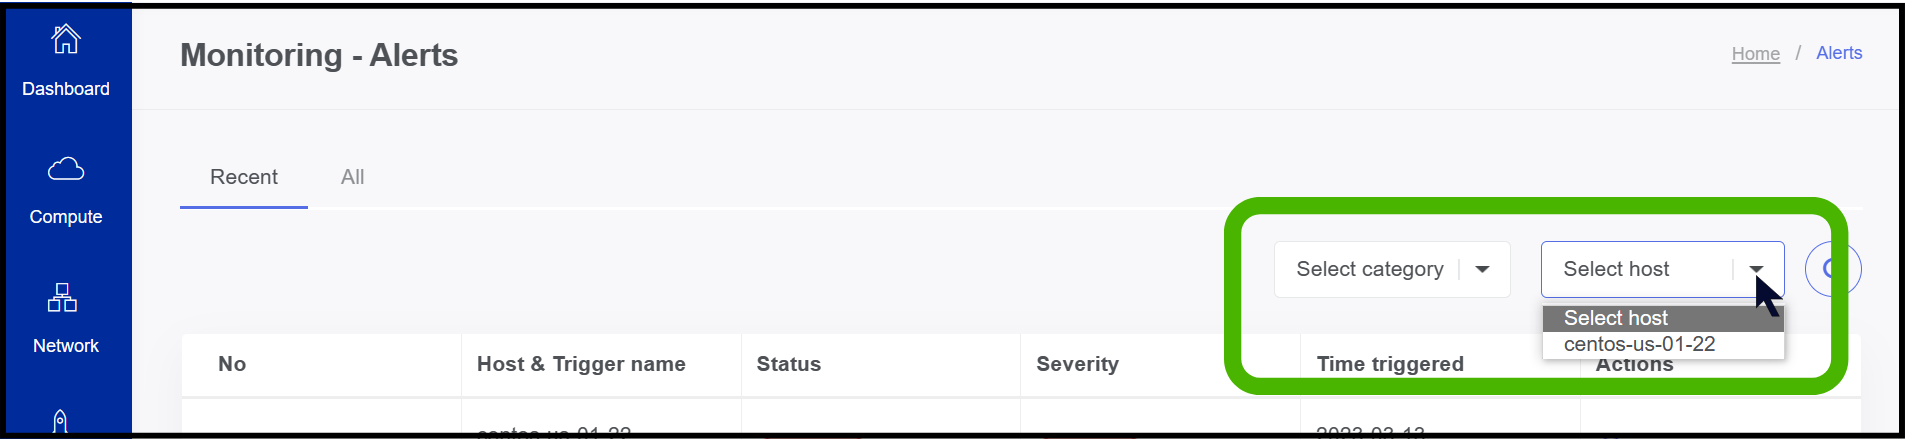
- Here you can filter the host and alerts.
Manage Notification in StackBill CMP
- The Monitoring option can be found on the left side of the portal.
- The screen displays a pop-up menu. To Manage Notifications click on Manage Notification option from the menu.
- Now Manage Notification option appears.
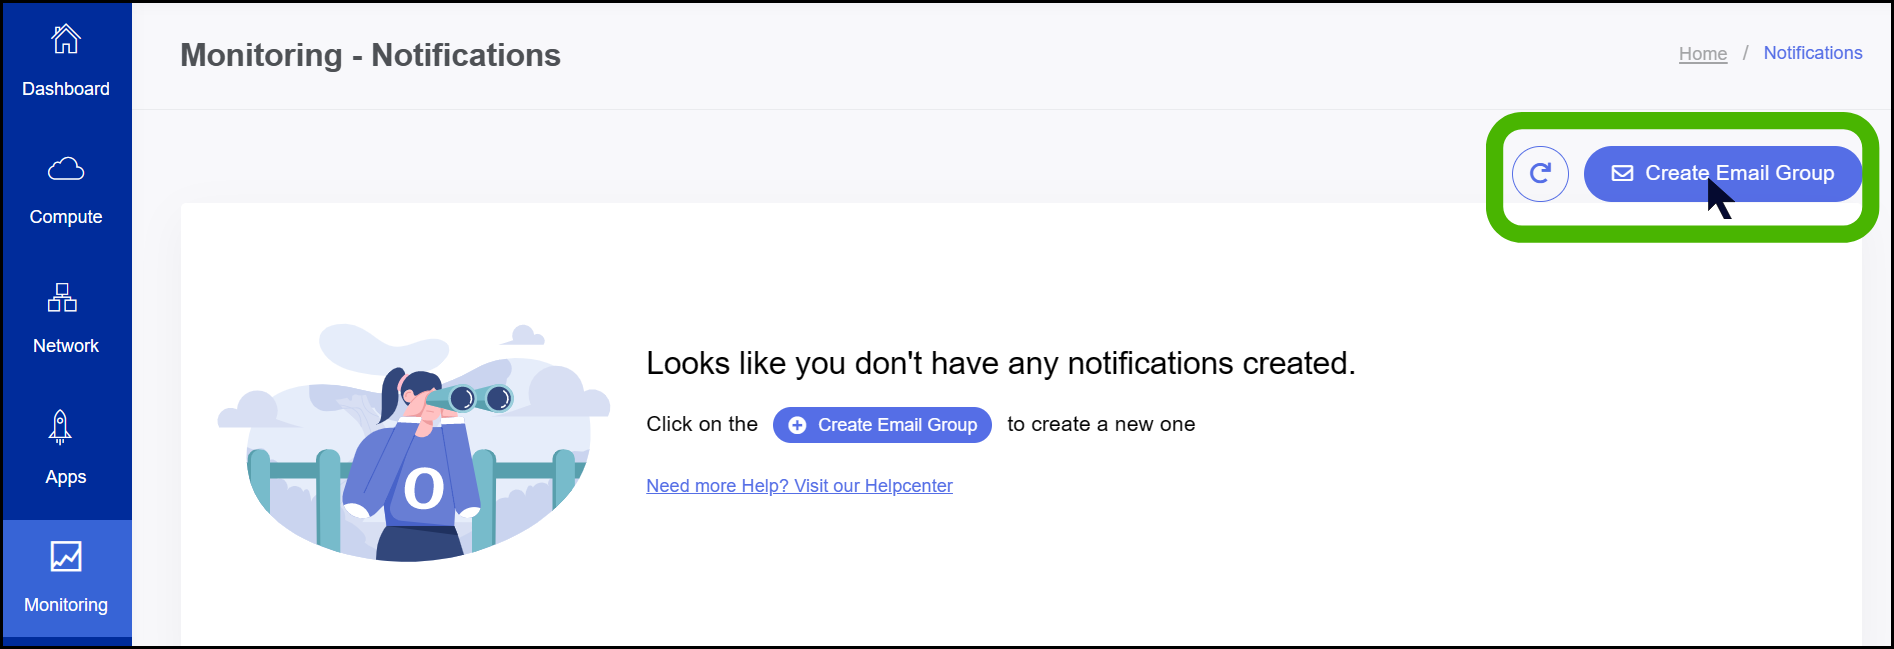
- Click on the Create Email group option on the left side of the Portal to create an email group.
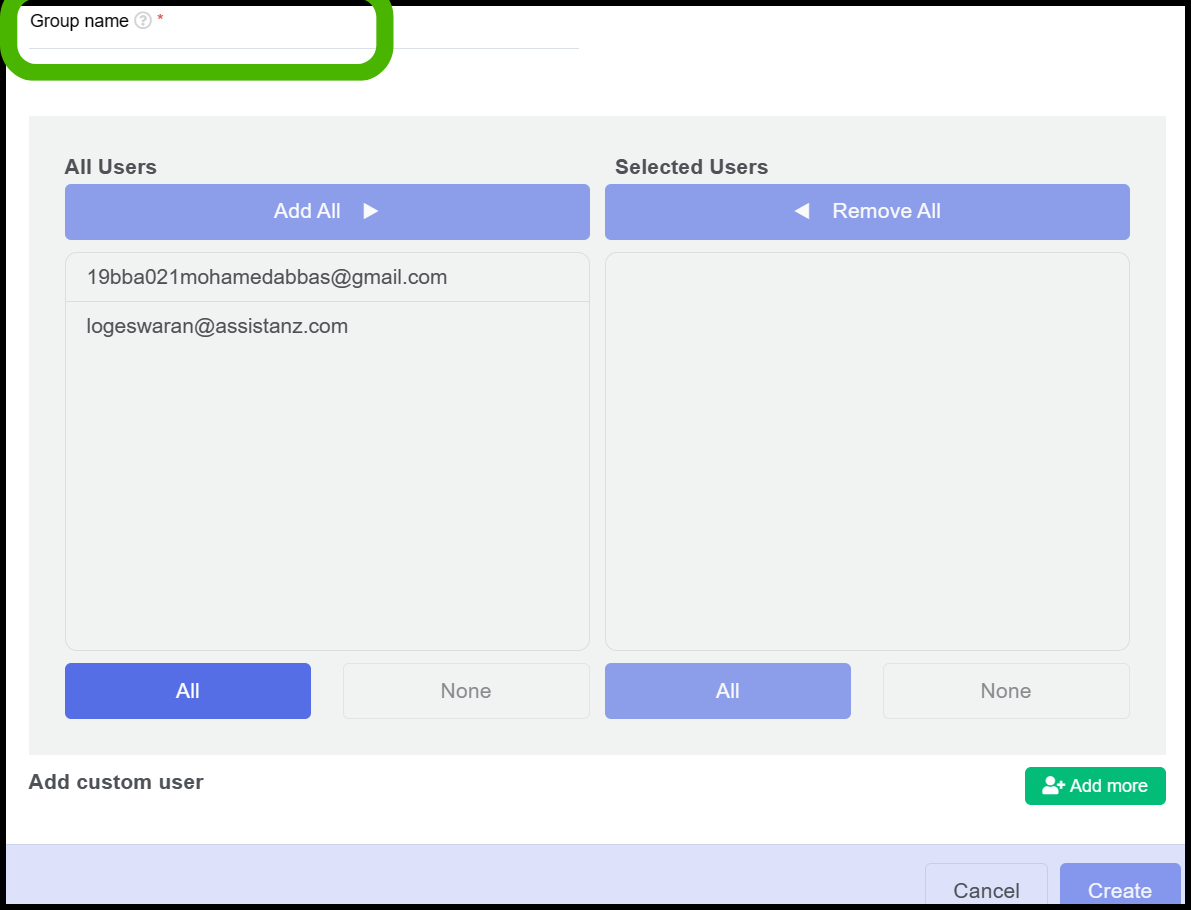
- Group Name - Give a Name for the group that you are creating.(For example:Team Marketing)
- Add the users that should be in the group.
- If you want to create a new user, click on the Button which is named ADD MORE.
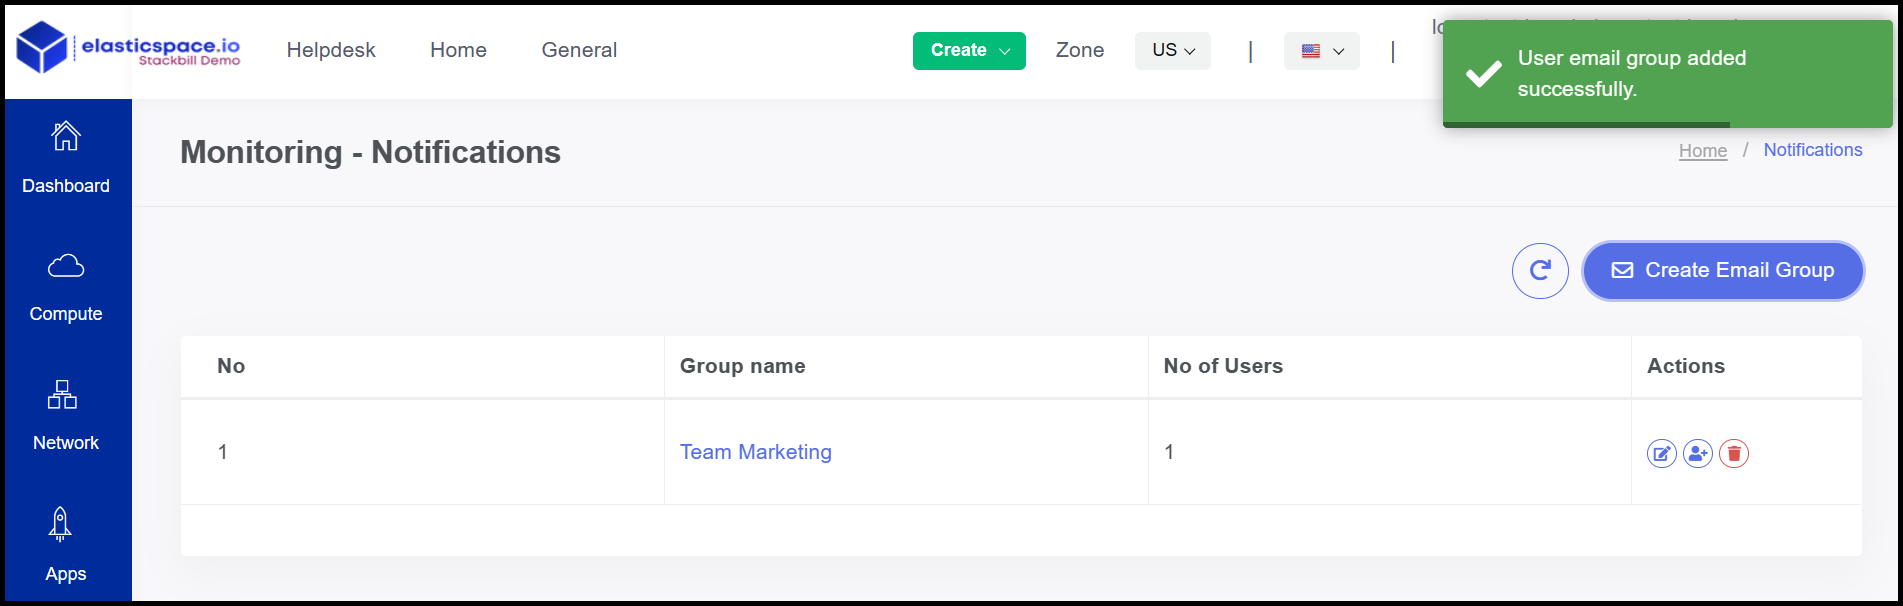
- Now the user mail group has been created successfully.
About StackBill
StackBill is a complete self-service intuitive Cloud Management Portal with extensive features leveraging Apache CloudStack® with state of art years of expertise.